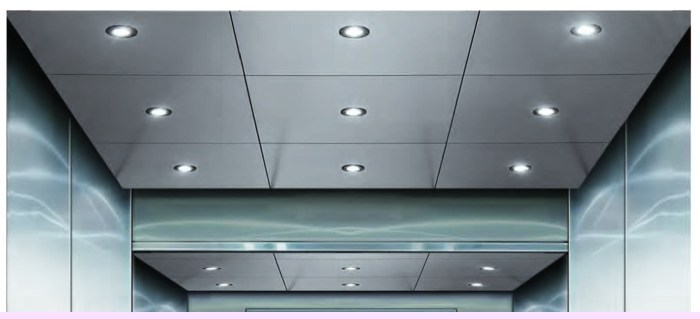
Troubleshooting problems with commercial elevator lighting can be a real headache, but understanding the common causes and troubleshooting steps can save time and money. This guide walks you through identifying issues, from simple bulb replacements to more complex electrical problems, covering various lighting technologies and essential safety procedures. We’ll explore everything from faulty ballasts to problematic wiring, offering practical solutions for maintaining safe and well-lit elevator environments.
Whether you’re dealing with flickering lights, complete darkness, or specific issues with LED, fluorescent, or incandescent systems, this guide provides a comprehensive approach to diagnosing and resolving lighting malfunctions in commercial elevators. We’ll delve into the specifics of each lighting type, outlining unique troubleshooting methods and providing practical tips for efficient problem-solving.
Identifying Common Lighting Issues
Elevator lighting problems are a common occurrence, impacting both passenger comfort and safety. Understanding the root causes of these issues is crucial for efficient troubleshooting and repair. This section will detail the most frequent causes of elevator lighting malfunctions, focusing on faulty bulbs, ballast problems, and wiring issues, along with their associated symptoms.
Faulty Bulbs
Incandescent bulbs, though less common now, are susceptible to filament burnout, resulting in complete lighting failure. Fluorescent tubes can experience dimming, flickering, or complete failure due to the depletion of phosphor coating or internal gas. LED lights, while generally more durable, can also fail due to component wear or power surges. The lifespan of each bulb type varies significantly, with incandescent bulbs having the shortest lifespan and LEDs generally the longest.
Troubleshooting commercial elevator lighting often involves checking bulbs and ballasts, but remember that proper lighting design is key to preventing future issues. Understanding the principles of effective illumination, much like learning How to avoid common mistakes in landscape lighting design , can help you create a more efficient and reliable system. By planning for adequate brightness and consistent maintenance, you can minimize elevator lighting problems down the line.
For example, a high-traffic commercial elevator might require more frequent bulb replacements than one in a low-traffic residential building.
Ballast Problems
The ballast is a crucial component for fluorescent and some LED lighting systems. It regulates the flow of electricity to the lamps. A malfunctioning ballast can manifest as flickering lights, buzzing noises, or complete lighting failure. Ballast problems often lead to premature bulb failure, making it essential to identify and replace the faulty ballast before replacing the bulbs repeatedly.
A typical symptom is flickering lights that gradually dim before completely failing. In contrast, a faulty bulb usually results in an immediate and complete loss of light.
Wiring Issues
Problems with the elevator’s wiring system can cause a range of lighting issues, from partial dimming to complete darkness. Loose connections, damaged wires, or short circuits can all lead to malfunctions. These issues can sometimes affect multiple lights or other electrical systems within the elevator cab. Identifying the location of the wiring problem requires careful inspection and may necessitate the expertise of a qualified electrician.
For example, a short circuit might trip a breaker or cause a fuse to blow, resulting in a complete loss of power to the elevator’s lighting system.
Table of Common Elevator Lighting Problems
| Problem | Symptoms | Likely Cause | Initial Troubleshooting Steps |
|---|---|---|---|
| Faulty Bulb | Complete lighting failure in one or more fixtures; immediate loss of light. | Burned-out filament (incandescent), depleted phosphor (fluorescent), or LED component failure. | Visually inspect the bulb; replace the bulb with a known good one. |
| Ballast Problem | Flickering lights, buzzing noise, dimming lights, complete failure of multiple lights. | Malfunctioning ballast unit. | Check for buzzing sounds; try replacing the ballast. |
| Wiring Issues | Partial or complete lighting failure; multiple lights affected; tripped circuit breaker or blown fuse. | Loose connections, damaged wires, short circuits. | Check circuit breaker/fuse; visually inspect wiring for damage or loose connections (qualified electrician recommended). |
Troubleshooting Electrical Components
Elevator lighting problems often stem from electrical issues. Understanding how to safely and effectively troubleshoot these components is crucial for quick repairs and ensuring passenger safety. This section details procedures for checking circuit breakers, ballasts, light fixtures, and wiring. Remember to always disconnect power before working on any electrical component.
Checking the Elevator’s Lighting Circuit Breaker
Before investigating other components, verify the lighting circuit breaker is functioning correctly. Locate the elevator’s main electrical panel. This panel typically contains several circuit breakers, each controlling different aspects of the elevator’s operation. Identify the breaker specifically designated for the elevator lighting system; this may be labeled clearly or require consultation of the elevator’s electrical schematics. Visually inspect the breaker for any signs of damage, such as scorch marks or a tripped position (typically indicated by a switch that is not fully aligned with the other breakers).
If the breaker is tripped, carefully switch it to the “off” position, wait a few seconds, and then switch it back to the “on” position. If it immediately trips again, there’s a short circuit or significant fault within the lighting system, requiring further investigation. If the breaker remains on, the issue lies elsewhere within the lighting circuit.
Testing the Elevator’s Lighting Ballast
The ballast is a crucial component that regulates the flow of electricity to fluorescent lights. A faulty ballast can prevent lights from functioning correctly or even cause them to flicker. To test a ballast, first ensure the power to the lighting circuit is completely disconnected. Then, carefully remove the fluorescent light fixture to access the ballast. Ballast testing often involves using a multimeter to check for continuity and proper voltage readings across its terminals.
Consult the ballast’s specifications for exact testing procedures and expected readings. If the multimeter readings deviate significantly from the specifications, the ballast is likely faulty and needs replacement. Remember to always follow manufacturer’s instructions for safe ballast handling and testing. A faulty ballast may exhibit signs of overheating, such as discoloration or burning smell.
Replacing a Faulty Fluorescent Light Fixture
Replacing a faulty fluorescent light fixture is a relatively straightforward process, but safety precautions are paramount. Ensure the power is disconnected from the lighting circuit. Carefully remove the existing fixture by unscrewing it from its mounting bracket. Before installing the new fixture, visually inspect the wiring connections for any damage or loose connections. Connect the new fixture’s wiring to the existing wiring, ensuring a secure connection.
Mount the new fixture and carefully restore power to the circuit. Observe the new fixture to ensure it functions correctly. If the new fixture doesn’t light, the problem might lie elsewhere in the electrical circuit, such as a faulty ballast or wiring issue.
Inspecting and Repairing Damaged Wiring
Damaged wiring can lead to malfunctions, electrical shorts, and fire hazards. Before commencing any repair work, ensure the power to the elevator lighting circuit is completely disconnected. Carefully inspect all wiring within the elevator’s lighting system for any signs of damage, such as fraying, cuts, or burns. If damage is found, the damaged section of wiring must be replaced.
Use wire strippers to remove insulation from the ends of the new wire, ensuring a clean and precise cut. Connect the new wire securely to the existing wiring using appropriate connectors. Ensure all connections are well-insulated to prevent shorts. After completing the repair, carefully restore power to the circuit and test the elevator lighting system to ensure it is functioning correctly.
Any uncertainty during this process should warrant contacting a qualified electrician.
Troubleshooting commercial elevator lighting can be tricky, especially if you’re dealing with older systems. Before you dive into repairs, however, consider the overall cost; getting a price quote might be a good first step, especially if you’re looking at a complete overhaul. Check out this helpful resource for a Price comparison for a 2-story building commercial elevator installation to get a better sense of potential expenses.
This can help you prioritize whether lighting fixes are a small part of a larger project or need immediate attention.
Addressing Specific Lighting Technologies: Troubleshooting Problems With Commercial Elevator Lighting

Source: miltronicsinc.com
Troubleshooting elevator lighting involves understanding the specific technology used. Different lighting types present unique challenges and require varied approaches to repair. This section compares and contrasts troubleshooting methods for LED, fluorescent, and incandescent lighting commonly found in elevators, highlighting their unique challenges and outlining a systematic approach for LED troubleshooting.
LED, fluorescent, and incandescent lighting each have distinct failure modes and diagnostic techniques. Incandescent bulbs are relatively simple, with failure often indicated by a burned-out filament. Fluorescent tubes can fail due to issues with the ballast, starter, or the tube itself. LEDs, while generally long-lasting, can experience failures related to driver circuits, LED chip degradation, or connector problems. The complexity increases with the sophistication of the lighting system.
Troubleshooting Methods Comparison
A comparative analysis of troubleshooting methods for LED, fluorescent, and incandescent elevator lighting reveals significant differences. Incandescent bulb troubleshooting is straightforward; a visual inspection usually suffices. Fluorescent lights require testing the ballast, starter, and tube individually using a multimeter. LED lighting systems demand a more systematic approach, often involving checking the power supply, driver board, and individual LEDs. This requires more specialized tools and expertise.
Unique Challenges of Each Lighting Technology
Each lighting technology presents its own set of challenges. Incandescent bulbs are prone to burnout and offer limited lifespan. Fluorescent tubes are susceptible to ballast failures, requiring specialized knowledge for diagnosis and replacement. LED lighting, while energy-efficient and long-lasting, can have complex driver circuits that require specialized testing equipment for fault finding. Furthermore, replacing individual LEDs within a larger array can be challenging and time-consuming.
LED Lighting Troubleshooting Flowchart
The following flowchart illustrates a systematic approach to troubleshooting LED elevator lighting:
Start
Check Power Supply to Fixture: Is power reaching the fixture? (Yes/No)
Yes: Proceed to next step. No: Check wiring and breakers.
Check LED Driver: Is the driver functioning correctly? (Use a multimeter to check output voltage.) (Yes/No)
Yes: Proceed to next step. No: Replace the LED driver.
Inspect LEDs: Are any LEDs visibly damaged or not illuminating? (Yes/No)
Yes: Replace faulty LEDs. No: Check connections.
Check Connections: Are all connections secure and free from corrosion? (Yes/No)
Yes: The system should be working. No: Repair or replace connections.
End
Common Spare Parts
Maintaining a stock of common spare parts is crucial for efficient elevator lighting repairs. The specific parts required vary depending on the lighting technology used.
Troubleshooting commercial elevator lighting can be tricky, especially with older models. If you’re dealing with persistent issues and considering a replacement, finding a cost-effective solution is key. That’s where checking out resources like Where to buy a used commercial elevator at a good price can help. Once you have a functioning elevator, remember to regularly inspect the lighting system to prevent future problems.
- Incandescent Lighting: Replacement incandescent bulbs of the correct wattage and voltage.
- Fluorescent Lighting: Fluorescent tubes (including different lengths and wattages), ballasts, and starters.
- LED Lighting: LED modules or individual LEDs, LED drivers, connectors, and wiring.
Safety Procedures and Regulations
Source: cooperelevators.com
Working on elevator lighting systems presents significant safety risks due to the electrical components involved and the potential for falls. Prioritizing safety is paramount to prevent accidents and ensure compliance with regulations. Thorough preparation and adherence to established procedures are crucial for every task.Elevator lighting repair should only be undertaken by qualified and trained personnel. Improper handling of electrical components can lead to serious injury or death.
Furthermore, working at heights within an elevator shaft requires specialized knowledge and equipment to mitigate fall hazards. Compliance with local and national safety regulations is mandatory, and neglecting these guidelines can result in severe penalties.
Essential Safety Precautions
Before commencing any work, a thorough risk assessment must be conducted. This involves identifying all potential hazards, such as exposed wires, high voltage components, and the risk of falling. Appropriate control measures, including the use of personal protective equipment (PPE) and isolation procedures, should be implemented to mitigate these risks. Furthermore, the elevator should be completely de-energized before any work on the electrical system begins.
This prevents accidental shocks and electrocution. Finally, ensuring a clear and safe working area is essential to prevent trips and falls.
Relevant Safety Regulations and Codes
Elevator maintenance and lighting are governed by stringent safety regulations and codes, varying slightly depending on location. These regulations typically address electrical safety, fall protection, lockout/tagout procedures, and emergency response protocols. For example, OSHA (Occupational Safety and Health Administration) in the United States sets comprehensive standards for elevator maintenance, including requirements for electrical safety, lockout/tagout procedures, and personal protective equipment.
Similar regulations exist internationally, often mirroring OSHA’s guidelines or building upon them. Consult your local authorities for specific codes and standards applicable in your region. Ignoring these regulations can result in fines, legal action, and, most importantly, severe injuries or fatalities.
Safety Equipment Checklist, Troubleshooting problems with commercial elevator lighting
A comprehensive checklist of safety equipment is vital for ensuring worker safety during elevator lighting troubleshooting. This equipment includes, but is not limited to: insulated tools (screwdrivers, pliers), voltage testers, personal protective equipment (PPE) such as safety glasses, gloves, and hard hats, a non-conductive ladder or platform, fall arrest system (harness and lanyard), and a lockout/tagout device. Additional equipment might be necessary depending on the specific task and the type of elevator.
Regular inspection and maintenance of this equipment is crucial to guarantee its effectiveness and safety.
Lockout/Tagout Procedures
Lockout/tagout (LOTO) procedures are critical for preventing accidental energization of electrical equipment during maintenance or repair. Before starting any electrical work, the power supply to the elevator lighting system must be completely isolated. This typically involves switching off the main power breaker and then applying a lockout device (a lock) to prevent accidental re-energization. A tag clearly identifying the worker performing the maintenance and the reason for the lockout must also be attached.
Only authorized personnel should remove the lockout device after the work is completed and the system has been thoroughly inspected. Failure to follow proper LOTO procedures can result in serious electrical shocks or electrocution.
Advanced Troubleshooting Techniques
Source: smoulift.com
When basic troubleshooting steps fail to resolve elevator lighting issues, employing advanced techniques and specialized tools becomes necessary. This often involves a deeper understanding of the elevator’s electrical system and the ability to interpret data from diagnostic equipment. A systematic approach is crucial for efficiently pinpointing the problem’s root cause.Specialized diagnostic tools significantly enhance the troubleshooting process. These tools allow technicians to accurately measure voltage, current, and resistance within the elevator’s lighting circuit, identifying inconsistencies or anomalies that might otherwise be missed.
Examples include digital multimeters with high-voltage probes, clamp meters for measuring current without breaking the circuit, and specialized elevator diagnostic interfaces that can read data directly from the elevator’s control system. These interfaces often provide real-time information on the status of various elevator components, including lighting circuits.
Interpreting Diagnostic Data from Elevator Control Systems
Elevator control systems typically store diagnostic logs and real-time data regarding the performance of various subsystems, including lighting. Analyzing this data can reveal patterns or error codes indicating the specific location and nature of a lighting fault. For instance, a consistent error code related to a specific lighting circuit breaker or a sudden drop in voltage recorded at a particular time might point directly to the faulty component or a wiring problem.
Experienced technicians understand how to interpret these codes and logs effectively, speeding up the troubleshooting process. Understanding the specific elevator’s control system’s architecture is critical for accurate interpretation.
Isolating the Source of a Lighting Fault
A systematic approach to isolating the source of a lighting fault involves a step-by-step process of elimination. This might begin with visual inspection of the lighting fixtures, wiring, and connections, checking for obvious damage or loose connections. Next, testing with a multimeter would be used to measure voltage at different points in the circuit, comparing readings against expected values.
If a voltage drop is detected, it indicates a problem within that section of the circuit. The process continues until the faulty component or connection is identified. This methodical approach ensures that the problem is addressed correctly, preventing further damage or unnecessary repairs.
Visual Representation of Elevator Lighting Circuit
Imagine a simplified electrical path. Power originates from the elevator’s main power supply, often a high-voltage source. This power then travels through a main circuit breaker, acting as a safety switch. From the breaker, the power flows through a series of wires to a control panel, which houses the elevator’s control system and lighting circuit components. Within the control panel, a relay or solid-state switch, activated by the elevator’s control system, directs power to the elevator lighting circuit.
The power then travels through more wiring to the lighting fixtures themselves, which might be fluorescent, LED, or incandescent lights located inside the elevator car. The current returns to the power supply through a separate return wire completing the circuit. Any break or fault in this path will interrupt the flow of electricity to the lights. For instance, a tripped breaker, a faulty relay, a broken wire, or a malfunctioning light fixture will prevent the lights from working.
Conclusion
Successfully troubleshooting commercial elevator lighting requires a systematic approach, combining knowledge of electrical systems with adherence to strict safety regulations. By understanding the common causes of malfunctions, employing appropriate testing techniques, and prioritizing safety, you can effectively address lighting issues, ensuring the smooth and safe operation of your elevators. Remember to always prioritize safety and consult with qualified professionals when needed for complex repairs.
FAQ Compilation
What should I do if the elevator lights are flickering?
Flickering lights often indicate a problem with the ballast, loose wiring, or a failing bulb. Check the ballast for any visible damage and ensure all wiring connections are secure. If the problem persists, replace the bulb and/or ballast.
How often should I inspect the elevator’s lighting system?
Regular inspections, ideally as part of a scheduled maintenance program, are crucial. The frequency depends on usage and local regulations, but at least an annual inspection is recommended.
Can I perform elevator lighting repairs myself?
Minor repairs like bulb replacements are often manageable, but complex electrical work should always be left to qualified electricians experienced in elevator systems to ensure safety and compliance with regulations.
What are the potential hazards of working on elevator lighting?
Working with electrical systems presents risks of electric shock, falls, and exposure to hazardous materials. Always follow lockout/tagout procedures and use appropriate safety equipment.
Where can I find replacement parts for my elevator lighting system?
Contact your elevator maintenance provider or search online for suppliers specializing in elevator parts. Be sure to specify the type of lighting system (LED, fluorescent, etc.) when ordering.